Sunday, October 30, 2022

Busy Week with very little sewing

This week has been so busy that I sewed very little.

The good news is my paper piecing book was delivered.
Now I have so many designs to make.


A couple of days were spent with this little bundle of energy.
And I loved every minute.


Our Clara Curtis/Country Girls are blooming after being transplanted in the heat this past summer.


Friday I had fun doing something outside of my usual sewing crafts.
Our public library offered a free painting class.
Rock painting!?
Ready for Halloween.


Now to the sewing portion of this post.

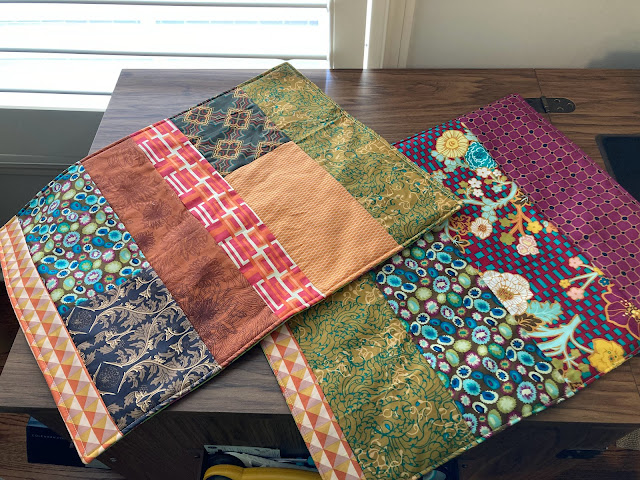
I made two placemats with fabric strips.


The back is a seersucker fabric.
The strips are leftovers from my box of Art Gallery fabric I won in the Fab Shop Hop many years ago.


Two made. Four more to make.
Memphis Modern Quilt Guild is donating placemats to a senior center for Thanksgiving.
They requested dark fabrics that wouldn't show spills.


Next week I should have more sewing time.
How was your week?


Sunday, October 23, 2022

Paper Piecing Newbie

Paper piecing is a new endeavor for me.
I avoided paper piecing patterns for years.
Then UTQG's block of the month for October came up.
Lynn M. had an online session on how to make the paper pieced block.
Paper Piecing finally made sense!


This block was made from 8 sections sewn into 4 squares, then assembled into the block.


I wrote the fabric colors on each section.


Each square was sewn on the diagonal.


Two squares sewn together on top and bottom.


Paper removed and seams ironed open.


Finished!

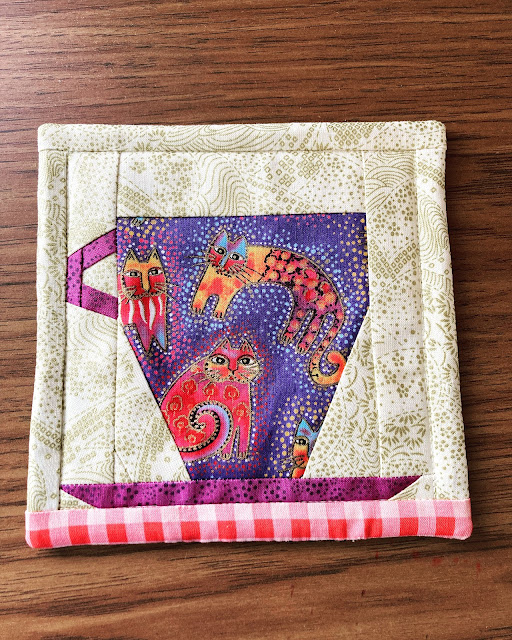
After that I wanted to make a tea cup shaped mug rug.
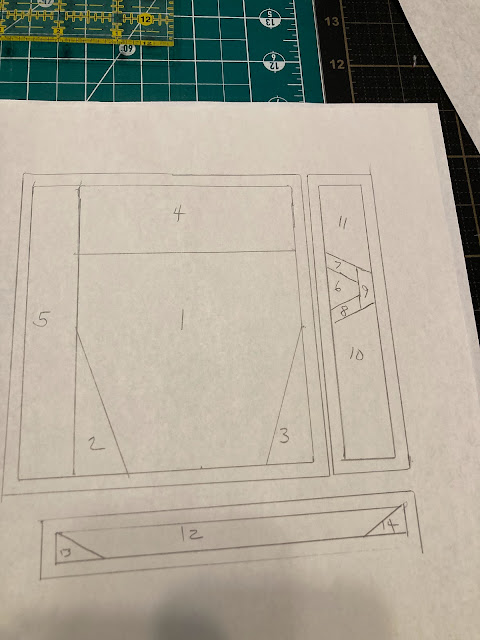
The pattern I had was the one below.


I wanted a taller cup with less background at the top so
I drew a new pattern.
The handle had to move up, too.


I am very happy with the finish and I feel pretty confident with paper piecing.


I liked the tea cup so much I decided to make a tea themed wall hanging.
I pulled a shoe box full of fabric scraps to use.


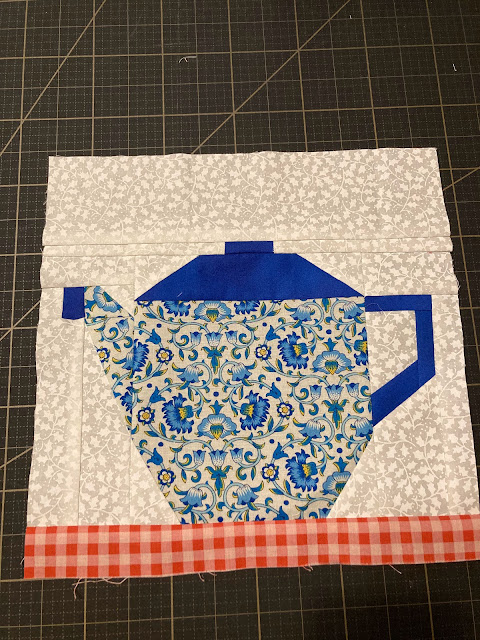
First up, a tea pot in a fabric I really love.
I have a half yard and that may be enough for this project.


I had downloaded and printed the tea pot below.
It was too small so I enlarged it on my printer.


After enlarging the pattern I traced it in sections that I thought would work.


Oops! A foot photo. Haha.

I made the tea pot in 4 sections like the one below.


Look for more tea time blocks next week.

Other sewing-


What happened? A little girl I know cut her school uniform in several places.
She said she was bored but after working on repairing the dress, I think the dress may be the problem.
It smelled odd when I ironed it and the fabric is not as soft as little girl's other clothes.
I think she cut it so she wouldn't have to wear it.
Sometimes it is hard to tell big people how you feel when you are little.

Have a great week!


Saturday, October 15, 2022

New York Fabric & Threads

We spent the week in New York wrangling the grandsons to school and after school activities.
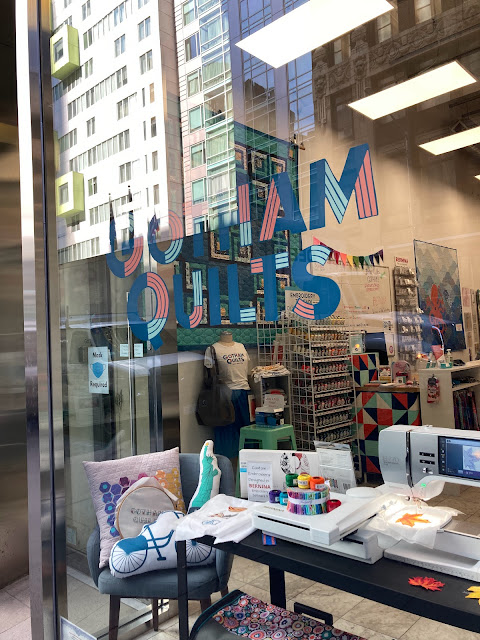
While they were in school we took in a new exhibit at the Met on the Tudors, ate in Little Italy, bought pastries in the neighborhood and Chinatown, and visited Gotham Quilts.


I took photos to remember how the shop looks so I can find it on our next visit.


Here is what I bought...


... a stack of fat quarters on sale, some NYC fabric, thread, 
and llama thread keepers.
Also I talked to the person who made the shop's version 
of Small World quilt.
I bought my kit at Gotham Quilts 3 years ago. I enjoyed talking to her about my variations and plans for binding and hand quilting. 

Below is the store's Small World quilt.


The Tudor exhibit had some embroidery from the period.
The stitches are so tiny I don't know how it could have been done.


Gold work on velvet and satin.
So intricate.


At the Cloisters the tapestries were amazing. It is hard to imagine how such complicated weaving was done back then.
I loved the flowers on this one.


Before we left for NYC there was a reception at the Cotton Museum for all of the quilters who made a mini quilt for the show. 
Ta-da-


 I made these cute bat candy holders for Halloween.


The boys thought the bats made great neckwear 
after they ate all the candy. Haha!


Next up
Paper Piecing Progress.


Friday, October 7, 2022

My version of a project bag

I took a free pattern from the internet and made some changes to make the bag fit my projects.
Documenting my changes for future reference.
The project bag takes 3 fat quarters, a batting scrap, a 14" or longer zipper, a piece of netting 13" X 18". 


I cut two pieces of fabric 13" X 18", added the same size batting and stitched around the edge 1/4".
Then I quilted it free motion on my sewing machine.


My zippers were shorter than the pattern suggested so I made some changes there.

I cut two 1.5" X 18" pieces from the front and back fabrics, then sewed the zipper between the fabrics. 
The zipper panel was short so I added two filler pieces of the same two fabrics - cut about 3" X 2.5" for each end.


I wanted fabric at the top and bottom so I cut a strip 2.5" X 18" from the binding fabric.

When sewing the filler pieces I stopped 1/2" from one side so I could fold under when I sewed the zipper to the net. If I had a longer zipper I would not have to do this step.


Above the zipper strip is ready to be sewn to the net.

Below, the bottom strip of fabric has been sewn to the bottom of the net piece.
I topstitched to clean finish and trimmed the fabric to the size of the netting.


The zipper was longer than the netting so I trimmed it after topstitching it.


This photo is out of order.
I sewed the zipper to the netting with the back fabric first - about 3/8" seam.


Then I turned and finger pressed the seam. Topstitched the front fabric to close in the raw edges.


Above is out of order. I measured the space needed for the filler fabric.

The original pattern called for a handle. I wasn't sure if I needed a handle 
but I knew I did not want it sewn inside the binding. 

I cut a piece of the binding fabric 4" X 12" and a piece of very stiff interfacing 3/4" X  11".
Topstitched the interfacing between the folded handle fabric.

I folded the raw ends and stitched the handle in place by finding the center of the 18" side and sewing 2" on either side of the center about 3/4" below the edge.


The rest of the assembly was easy. Baste the net front in place, sew the binding on the back, turn and sew on the front. The net was a little longer than the 13" side so I folded a little tuck where the fabric and net joined the bottom. As I stitched the binding down on the front I caught the handles so they stay up.


I do like the handle.
Here is my first project bag filled with a cross stitch pattern and supplies.
The zipper goes from right to left. 
Works for me since I'm left-handed.


In other finishes - a mug rug or small wall hanging started at quilt guild.

Carmen shared how to use tiny scraps by fusing and gluing.

I'm calling this 'Dragonfly Sunset Mist'.

Tulle on top of the scraps and quilted in a zigzag stitch.
Binding is from mom's stash of purchased binding.


One last item-
I sewed flannel on the back of the measuring tape on my name tag for comfort.
I also used washable marker to outline my name to make it more readable.


That's all for now.
Going to NYC to stay with the boys next week.
I may get to Gotham Quilts while I'm there.

Happy sewing!


Sunday, October 2, 2022

Silent Auction Sewing & Learning to Paper Piece

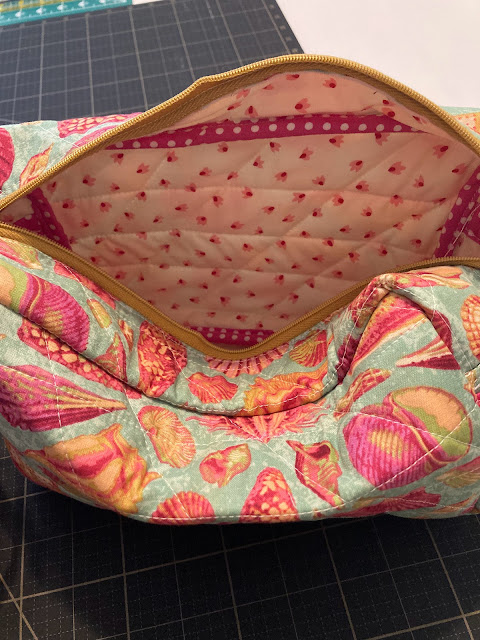
Mississippi Literacy Association asked for some silent auction items to raise funds for literacy grants to teachers. I am making some zip bags with a new pattern that only uses 3 fat quarters.


Sea shells above showing the lining and binding.

Below the first two bags finished.


Below the lining and binding on the tossed cats bag.


The third bag is almost finished - just the binding to do.


The outer and inner fabric has to be quilted together before the pieces are cut.
I love this day/night mirror image of houses but wasn't sure what to do with it.
I think it makes a cute bag.


Sorry for the sideways photos.

I am also making two flannel swaddling blankets and including some flannel bibs.
Surely someone will need baby gifts at the silent auction.


Saturday I zoomed with new quilt guild friends to learn how to paper piece.
I have always avoided paper piecing because I couldn't figure out the written directions.
Doing it with others on zoom with step by step instructions helped a lot.


The two sections we did together are one-fourth of the finished block.


I will finish the block later this week.

Below is a template for circles that I found at an art supply store.
I think I will use this for making appliqué circles on my wool appliqué project.


What have you been doing this week?
Hope you have found time to sew.